Subnautica 2 Beginner Guide
Tested in Early Access: unlock eating via Angel Branch DNA, find silver near the surface, find lead near the large shipwreck, defeat Angel Branch's two sub-branches, unlock heat resistance, enter the high temperature zone for gold, lithium and sulfur, then find Dead Rot Jellyfish for strong acid crafting.
Tested Route
Early Progression Overview
Step 1 — Unlock Eating
Unlock eating before you start long exploration runs. This is the first survival gate in the Early Access route because food and water options stay extremely limited until the Angel Branch DNA interaction is complete.
- Goal
- Unlock the ability to eat food and stabilize early survival.
- Start Point
- Return to your starting pod after basic orientation.
- Direction
- Look roughly between 15 and 30 degrees from the starting area.
- Landmark
- Find the Angel Branch creature near the pod route.
What To Do
- 1Swim back to the starting pod so your compass and route are easy to reset.
- 2Face the 15–30 degree direction range and move slowly, watching for the Angel Branch shape instead of rushing into deeper water.
- 3Approach Angel Branch and interact with it to trigger the eating DNA unlock.
- 4Return toward the pod after the unlock so you can recover oxygen and reorganize before resource gathering.
Common Mistake
Many players start gathering random fish or exploring deeper areas before unlocking eating. That makes hunger and water management feel broken even though the real blocker is the missing DNA unlock.
Done When
You can eat normally and no longer need to treat food as a locked mechanic. Move to silver only after this survival gate is cleared.
Step 2 — Find Silver
Silver is the first resource bottleneck after eating. Use Camp 1 as the anchor point so you are not searching random caves and wasting oxygen.
- Goal
- Collect silver for early advanced crafting recipes.
- Start Point
- Use the Angel Branch or starting area as your reset point.
- Direction
- Face roughly 30 degrees northeast from the Angel Branch location.
- Landmark
- Look for the cave system below the Camp 1 map label.
What To Do
- 1Set your direction from the Angel Branch area before moving, then swim toward the Camp 1 route.
- 2Look downward for the cave entrance below Camp 1 rather than staying at the surface.
- 3Enter the cave, collect silver deposits, and keep enough oxygen for the return swim.
- 4Return to the same cave later if you need more silver; this route is useful because it is repeatable.
Common Mistake
The common mistake is treating silver as a random resource hunt. If you do not anchor on Camp 1, you can spend a long time checking the wrong caves.
Done When
You have silver in your inventory and know how to return to the Camp 1 cave without rebuilding the route from scratch.
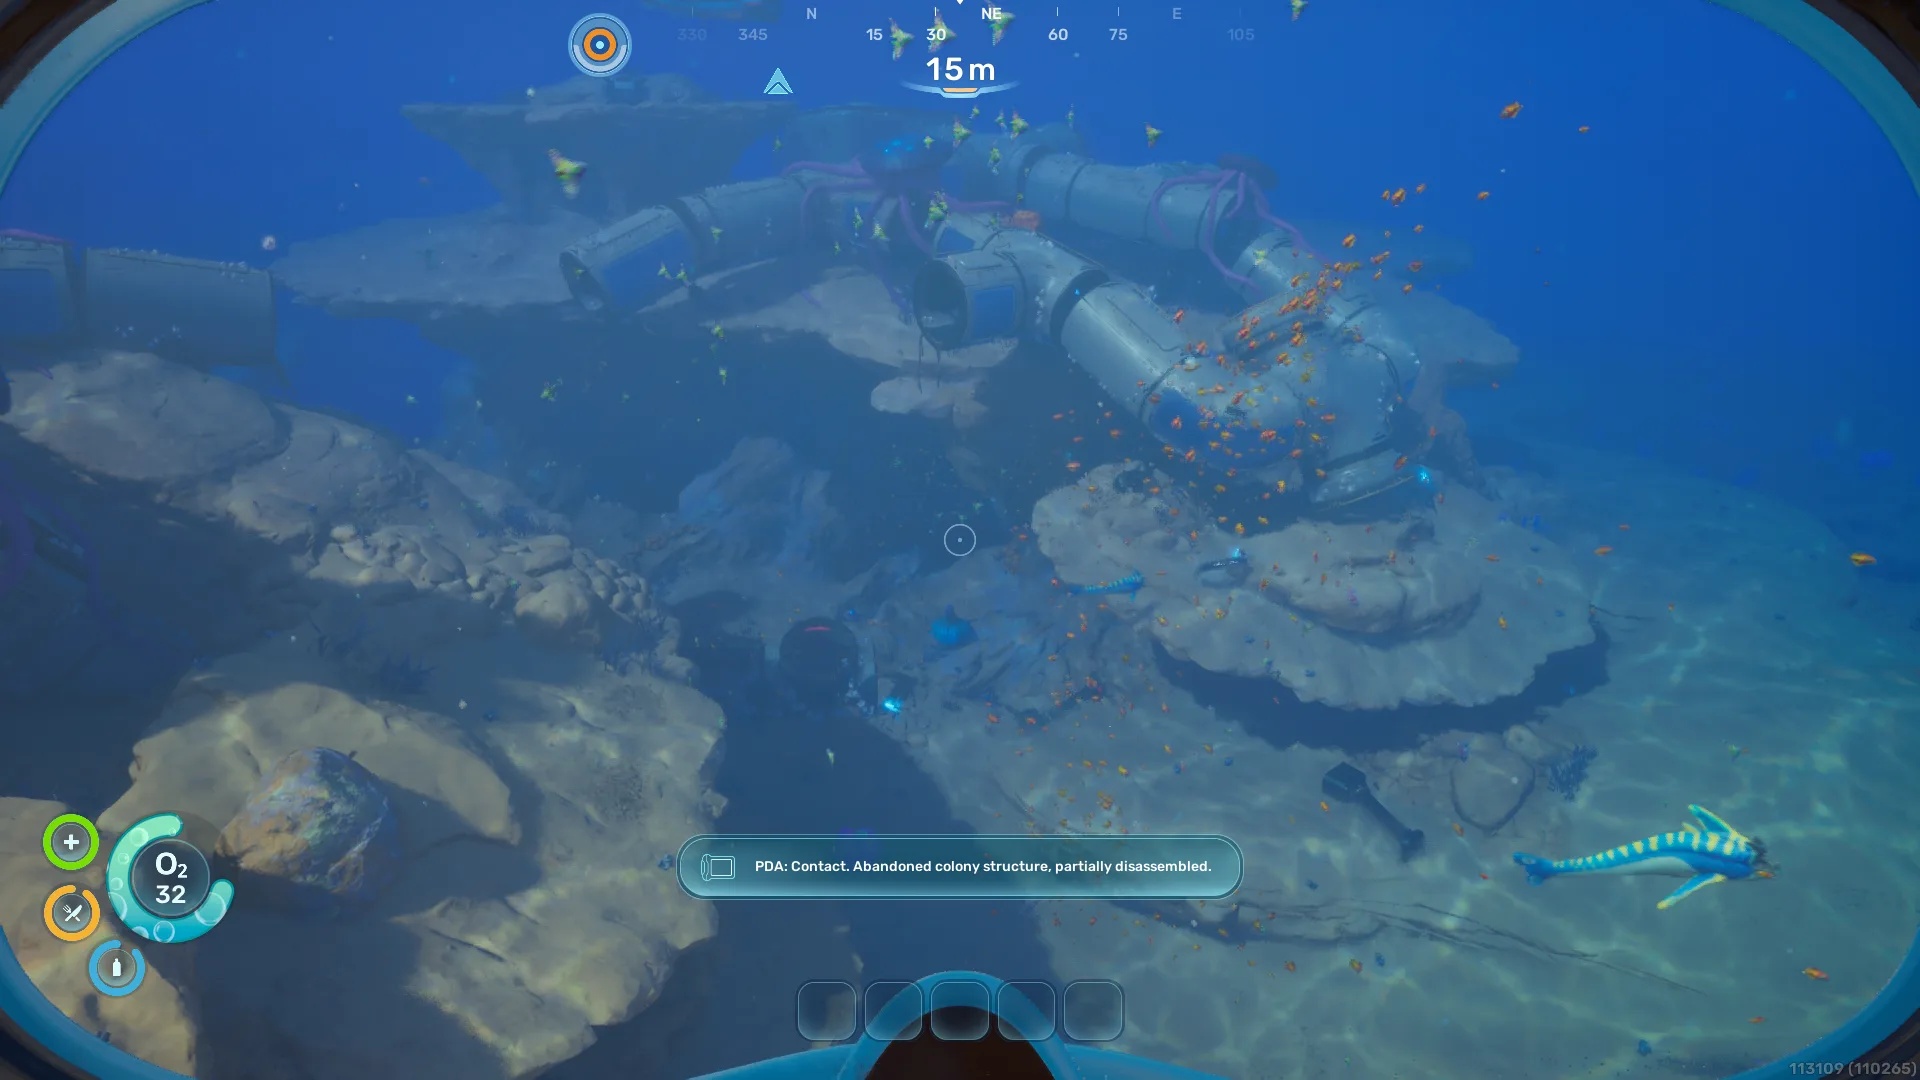
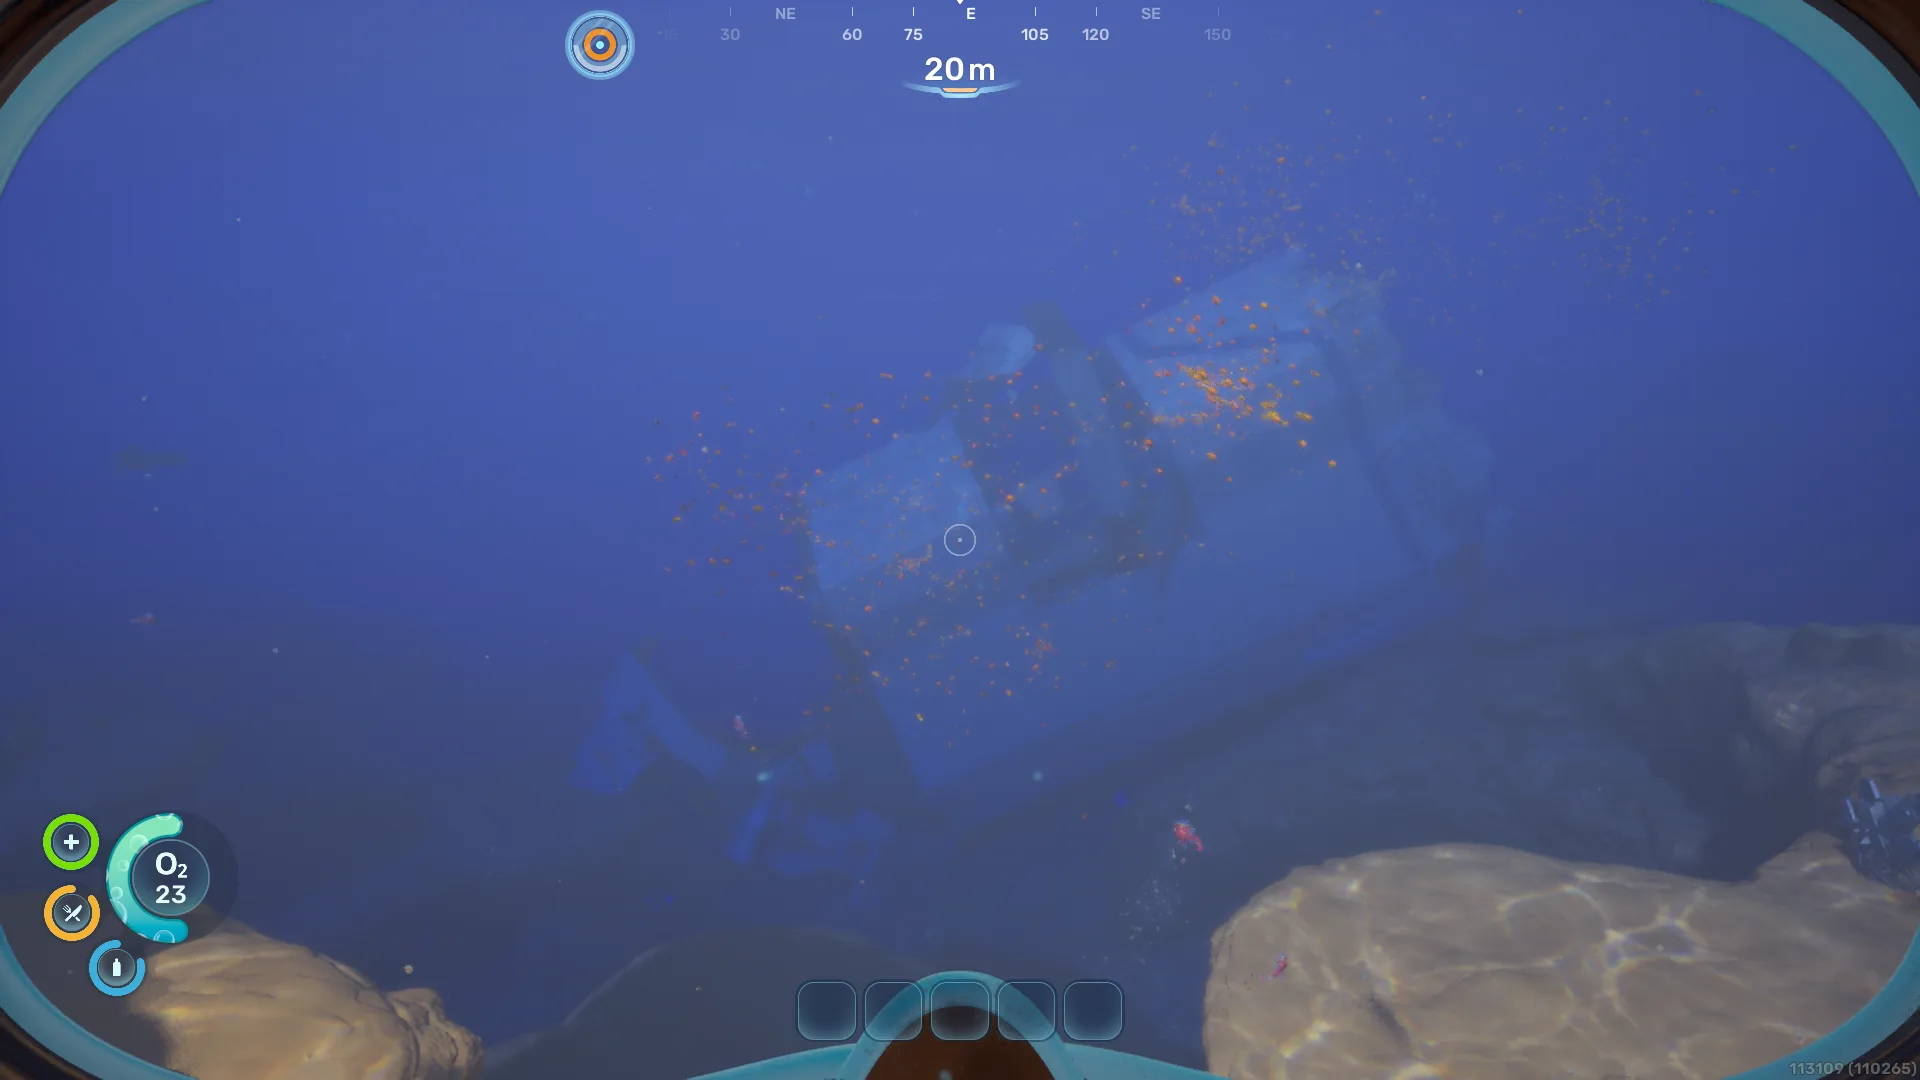
Step 3 — Find Lead
Lead is the second material gate. The easiest tested route uses Camp 1 as the positioning point, then sends you toward a large shipwreck where lead deposits are found nearby.
- Goal
- Collect lead for higher-tier equipment and progression.
- Start Point
- Position yourself directly above Camp 1.
- Direction
- Face approximately 75 degrees from above Camp 1.
- Landmark
- Find the large shipwreck and search the nearby deposits.
What To Do
- 1Return to Camp 1 first so your route starts from a known point.
- 2Move above Camp 1, face about 75 degrees, and swim toward the wreck rather than drifting along the seabed.
- 3Use the shipwreck as the visual anchor, then check the nearby terrain for lead deposits.
- 4Leave once you have enough lead for the next crafting push; do not keep extending the run if oxygen is getting tight.
Common Mistake
Players often search for lead immediately after silver without resetting at Camp 1. That makes the 75 degree route much harder to follow.
Done When
You have lead collected from the shipwreck area and can combine it with silver for the next stage of early crafting.
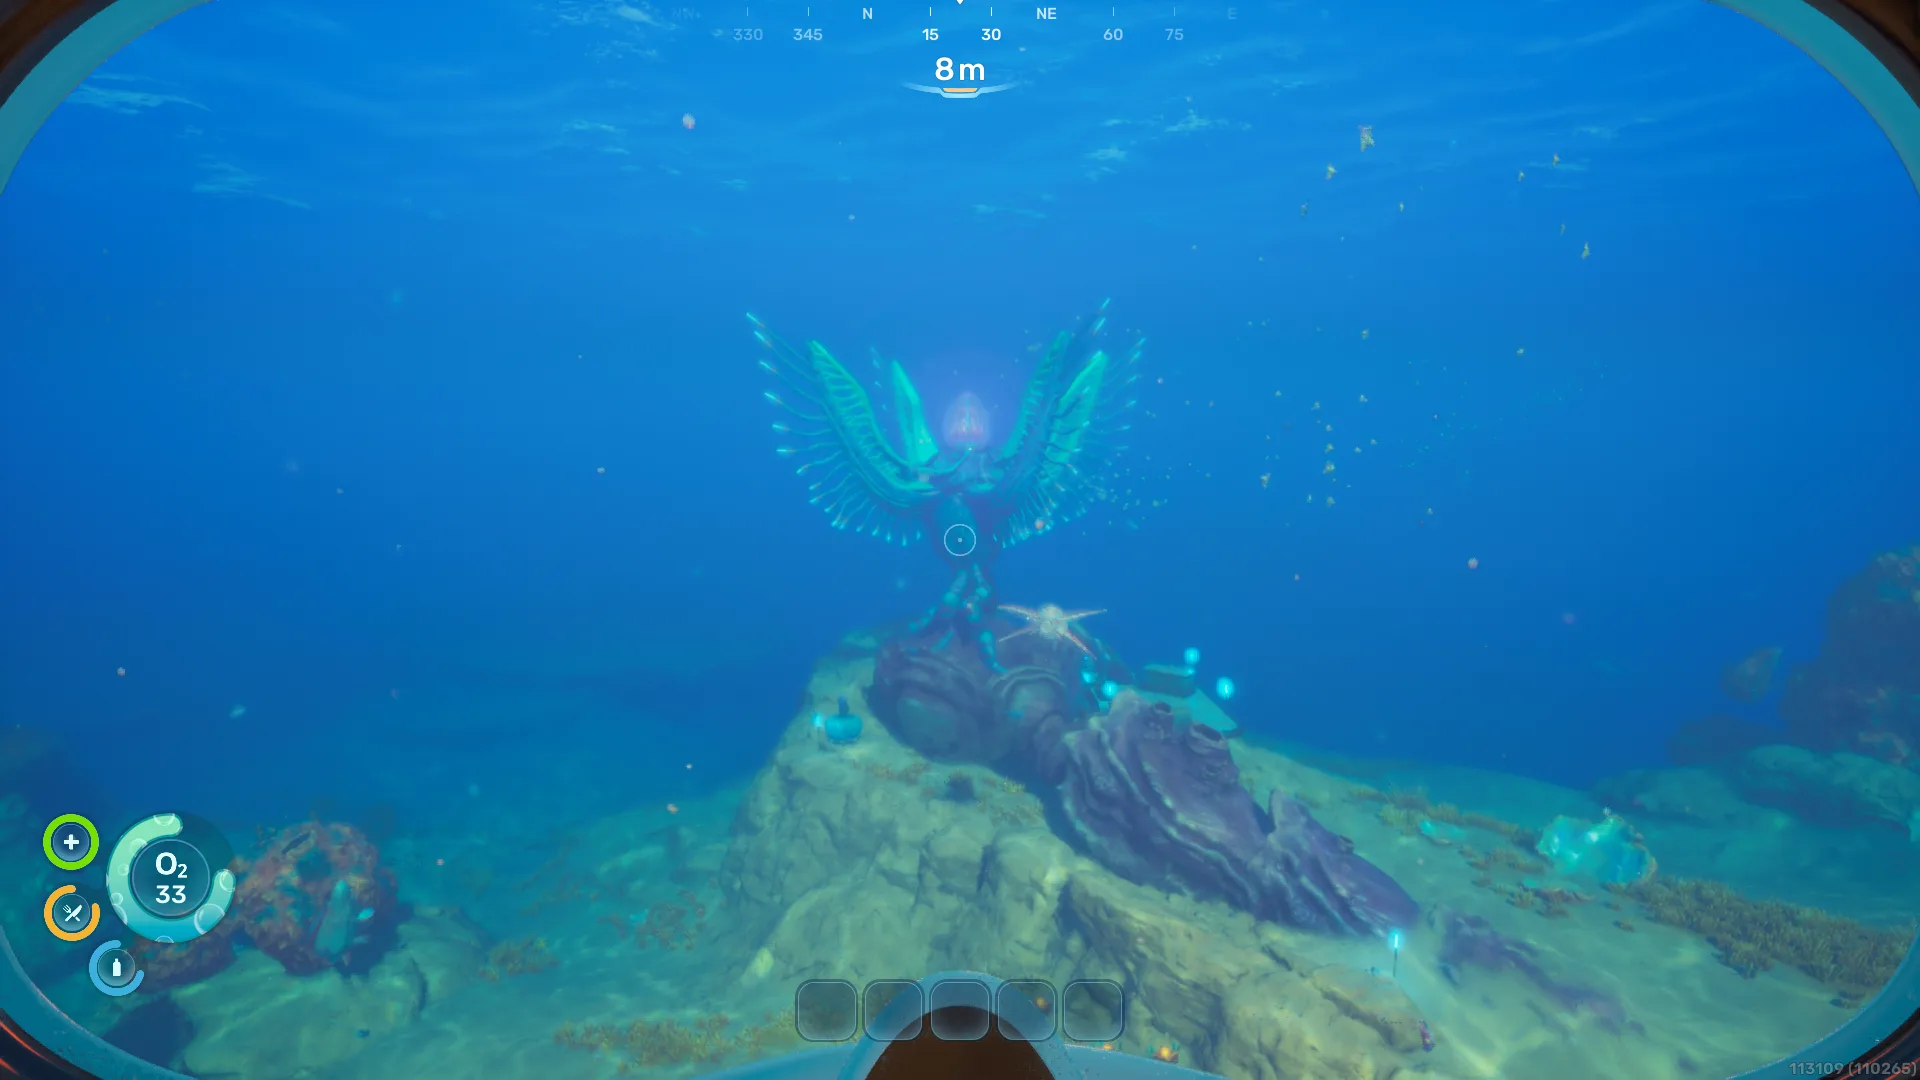
Step 4 — Handle Angel Branch
Angel Branch is the first real mechanic check. The closed flower is not the target at first: you need to follow the tentacles, destroy two sub-branches, then return to the main body.
- Goal
- Open and defeat Angel Branch to unlock heat resistance.
- Start Point
- Return to the main Angel Branch body after silver and lead are handled.
- Direction
- Follow the large tentacles extending away from the main body.
- Landmark
- Two smaller sub-branches connected to the main Angel Branch.
What To Do
- 1Approach the main Angel Branch and confirm the flower is closed.
- 2Follow one large tentacle away from the body until you locate a sub-branch.
- 3Destroy the first sub-branch, then trace the remaining tentacle path to find the second one.
- 4After both sub-branches are defeated, return to the main Angel Branch body and finish the encounter.
Common Mistake
A lot of players keep attacking or inspecting the closed flower directly. The flower stays closed until both sub-branches are handled.
Done When
Angel Branch is defeated and heat resistance is unlocked, which makes the high temperature zone route possible.
Step 5 — Enter the High Temperature Zone
The high temperature zone is the next progression wall. Do not enter it before heat resistance; once unlocked, use the Angel Branch location as your route anchor and push toward advanced resources.
- Goal
- Reach the high temperature zone and gather gold, lithium, and sulfur.
- Start Point
- Begin from the Angel Branch location after heat resistance unlocks.
- Direction
- Face approximately 105–120 degrees and swim about 400–500 meters.
- Landmark
- Warmer water, cave entrances, and resource-rich high temperature terrain.
What To Do
- 1Confirm heat resistance is unlocked before committing to the route.
- 2From Angel Branch, face 105–120 degrees and swim forward, using distance as your main guide.
- 3Look for the entrance into the high temperature zone and avoid spending too long outside safe oxygen range.
- 4Search the caves inside the zone for gold, lithium, and sulfur, then exit with a clear return path.
Common Mistake
The risky mistake is treating this like normal exploration. Without heat resistance or a planned return path, the zone can punish you quickly.
Done When
You have entered the high temperature zone, found its resource caves, and collected gold, lithium, and sulfur for the next crafting layer.
Step 6 — Find Dead Rot Jellyfish
Dead Rot Jellyfish turns the high temperature route into the next crafting unlock. Harvesting it lets you craft strong acid and continue toward later alien ruins progression.
- Goal
- Collect Dead Rot Jellyfish and craft strong acid.
- Start Point
- Use the high temperature zone area as your route anchor.
- Direction
- Face approximately 345–350 degrees, between north and northwest.
- Landmark
- A field of Dead Rot Jellyfish floating in the water.
What To Do
- 1From the high temperature zone, turn toward 345–350 degrees and swim forward.
- 2Watch for a field of floating Dead Rot Jellyfish rather than a cave or wreck landmark.
- 3Harvest enough jellyfish for strong acid crafting, then return before extending into unknown terrain.
- 4Use the Fabricator to craft strong acid and prepare for the alien ruins progression layer.
Common Mistake
Players often leave the high temperature route without grabbing Dead Rot Jellyfish, then get stuck because strong acid becomes the next material blocker.
Done When
You have Dead Rot Jellyfish, can craft strong acid, and are ready to continue toward the alien ruins and higher-tier materials.
Early Game Checklist
- Unlocked eating via Angel Branch DNA
- Found silver in the Camp 1 cave system
- Found lead near the large shipwreck
- Defeated Angel Branch's two sub-branches
- Defeated Angel Branch to unlock heat resistance
- Entered the high temperature zone
- Found gold, lithium, and sulfur in the zone's caves
- Found Dead Rot Jellyfish field and crafted strong acid
- Continued progression toward alien ruins